Showing posts with label Hair. Show all posts

Wednesday, June 13, 2012

The Sideways Braid to Bun

We've all done it. Seen something on pinterest and fall in love.  I finally recreated one of the hairstyles that I saw. I found the pin here

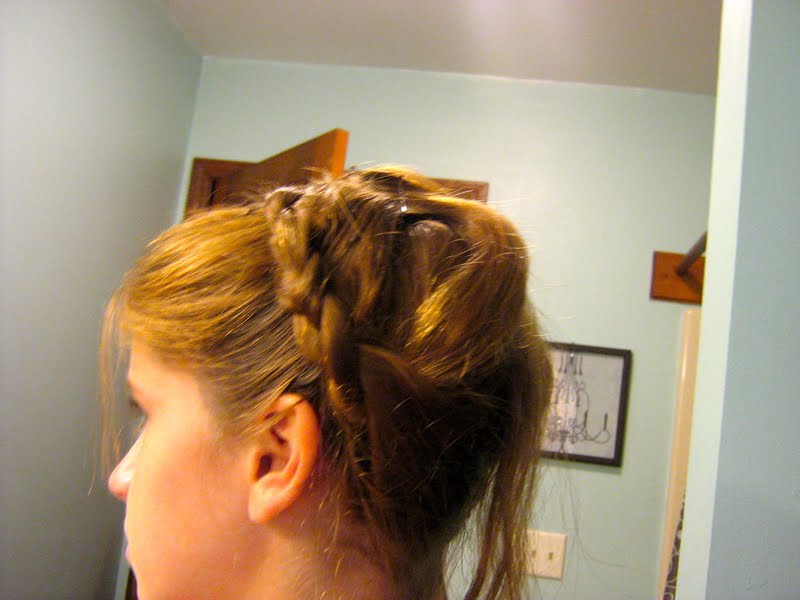
I decided I wanted to try it. I have this secret talent that I don't often share. I'm actually really good at braiding. French, Dutch, waterfall, fishtail, whatever. Anyway, I found my sister and made her let me try this on her I did a french braid that started at one side of her head, went to the other and then curved back into a bun. It was actually super simple!

The front kind of reminds me of a seashell. 

I did a successful messy bun for the first time. It's one of my downfalls really. I just can't do it!
My sisters hair is really unbraidable. It likes to sit in place and not be messed with. Plus it's really short so I feel pretty successful with the results of this... besides the fact that there was a slight bald patch that I left in the first picture. hahahaha. woops.

So then I tried it again. It looked okay but I still wasn't like totally amazed with it. So I tried it again with her hair slightly damp. It looked great! Here's the outcome of the third time:


My sister finally lost patience when I tried to get some pictures of the front.
 She's going to hate me for these!
I found it was easier to part the hair parallel to the forehead to create the head band part and put the rest of the hair in a loose pony tail.
 When the headband part is all braided, simply take the hair bandout and do the curve around braid. Braid the braided part to the very end of it and hair band it off.

This will prevent any of it from coming out. Simply gather the rest of the hair into a pony tail and then add the little braid to it.

Secure the whole hair into a ponytail and take out the hairband that was in the little braid. If anyone would be interested, I can do video or step by step picture tutorials.

I apologize for all the crappy iphone pictures and my messy room.

Monday, June 11, 2012

A Photo Shoot with the Best Friends

After my friends and I dip dyed our hair, we took some pictures of the results. Here's the outcome:


My best friend and I have known each other for around 15 years now. Oh my gosh. That's an incredibly long time.


I got this blue dress at Macy's for $19.99! Woo. It was an even better steal since I had a gift card.


Saturday, June 9, 2012

DIY Dip Dyed Hair

Me, along with some friends, finally took the plunge. (No not marriage). We dyed our hair! Well just the ends. We figured that if it doesn't turn out we can cut it off and plus we're not allowed to have unnatural hair at school so it'll get cut off at the end of summer. 
First off you're gonna want to take some before pictures.
Here's my friend:

 Here's me:
Here's my other friend. She came late and missed out on the mug shot pictures infront of my new basement walls! We've been a bit busy with all of our DIY stuff going on around the house. Anyway, you can see that her hair was really dark.

Unless you have incredibly blond hair, you're going to want to bleach the tips. Get some bleach and activator and mix it up according to the instructions.

Be sure to properly cover your clothing...

 and your work space... 

Apply bleach to the tips. We went for a thumb length on the tips. You'll want to section off the hair and use a small amount of hair with a large amount of bleach. The darker the hair, the heftier amount of bleach you'll want to use. Wrap the hair in foils as you apply the bleach.

 Leave the bleach in for the amount that the package says. We left ours in for around 30 minutes. As you can see, it didn't do that great of a job lightening on one of my friend's hair. If the package tells you to wash the hair, obviously wash it. Ours did and we washed and blow dried the ends.

 On mine it was a lot better. Probably the best out of the three of us.

 Due to lice treatments that had to be happening in the laundry room, we moved outside. Anyway, section of the hair and carefully paint the dye onto the bleached tips being sure to get FULL coverage. You'll probably find some missed spots! Check a few times. Pull the hair apart. Don't be afraid. Really get the dye in there! When the tips are all covered, wrap a plastic grocery bag around the hair. We just used a pony tail to keep it in. Let it sit for as long as the dye calls for. The longer it sits, the brighter the color.

Wash the dye out in a sink that can get dirty. As in a laundry tub or maybe use a hose. Some dye will wash out and get all over.

Just blow dry the ends or let them air dry. Wait until they're 100% dry to take off your protective clothing. The wet dye can still stain clothes.
When you're done, you'll be left with gorgeous hair or as my friends have said "Mermaid hair"!
Here's one of my friends:
 Here's mine: 
  Here's my other friend.
As you can see in my hair my friends missed some spots with the dye and I'm now left with awkward blond patches. Oh well. It'll all have to go before Summer ends!

Monday, August 22, 2011

Hair Attempt (and fail)

I've been loving the hair series that has been going on over at Eisy Morgan. What about you? I usually opt for my hair down all the time. On occasion, I'll twist my bangs back. Sometimes I'll where headbands or hair clips to change things up. It doesn't usually help. For practice, my hair is always in a pony tail. Yuck. Two pony tails doubled up, my bangs twisted to the side with two clips and then the other pieces that didn't quite make it clipped to the other side. I usually also wear a thick headband over it. So the moral of the story is, I'm boring. I can't really french braid my own hair other than my bangs and I never have the patience to straighten my hair or curl it. I've been loving her hair series a lot.

Well anyway, at her link party features, I found a link to a tutorial by Raising 4 Princesses. It was for a gorgeous braided up do. Let me just say, on her, it looks amazing! When it tried it.... yeahh....
I did it on my little sister and I'll just let you see the results. Please don't laugh.
  Front
 Side...
 Back...
 Other side...
She has layers so it was a little tough. I tried this on myself and got similar results.
Don't laugh at this either.
 It actually looks semi good from the front...
 This side looks okay...
And yeah. No. This is not a style that will be worn out into public. Now go visit Raising 4 Princesses. Her blog is so cute!
 I'm off to a corn roast. Sounds fun huh? It's a school event. We'll see how it goes.
Related Posts Plugin for WordPress, Blogger...