Showing posts with label Crafts. Show all posts

Monday, July 2, 2012

Guest Post: Patriotic Canister

I happen to be horrible at all things 4th of July. Like seriously. Once I made matching t shirts for my sister and I to wear to watch the fireworks. I actually still have mine. That's the extent of my patriotic craftiness.

So well I'm on vacation enjoying this heat (and the air conditioning!) I decided to bring in a 4th of July pro and an awesome blogger...
Here she is!

Hello Chica es Artistica fans!  I'm Danni from Silo Hill Farm.  My blog is mostly about making crafts that are quick, easy and inexpensive.  Many of them can be easily taken apart and reused for another project on another day.
I'm thrilled to be guest posting for Margaret here today!  She's one of the bloggers I admire most.....so much in fact that I wrote a whole post about her and if you missed it, you can read about it HERE, but you guys already know how awesome she is!

Today I'm going to show you a fairly quick and really easy project I made out of a cookie tin.  I love these cookies:


Recently, after finishing off a can of them (I may or may not have had a little help!), I figured instead of throwing that can away, I could probably make something out of it.  I have a lot of patriotic decor.  I l-o-v-e the 4th of July!  I figured I could make a patriotic canister out of this tin and after the 4th, use it to store some of my smaller red, white and blue stuff in.

I have some Washi tape that I picked up at Target.  It was $4 for 4 rolls, which means it was about a dollar per roll.  Super affordable.

I spray painted my can with just some basic white primer.  I like primer, it covers really well and dries like a flat paint.  After it was dry, I gathered up a my Washi tape, a stencil, a blue marker and a really cool adhesive temporary tattoo that I found on clearance after the 4th of July last year.
Obviously, everyone might not have snapped up one of those cool tats, but you could use buttons or jewels or whatever you have on hand!  I decorated the top first, because I have no patience and I really wanted to see what that jewelled tattoo would look like on the lid.  I also cut  a strip of the red dotted tape in half and put it around the base of the lid.
This was enough inspiration to keep me going!

I put some more of the Washi tape around my canister in kind of a random pattern, leaving an open space in the middle.

Then, I grabbed a stencil that had some numbers on it and, because I really stink at stencilling, I traced the numbers on first with a pencil.
Then I took my blue Crayola washable marker and just filled it in.
I thought about putting "USA" on it, but went with the numbers instead.

Whaddayuh think??  It's not only fun and patriotic, it's functional as well!  If you don't have Washi tape for the stripes, you could just tape them off with masking tape or painters tape and paint them on.  I even thought about using fabric for the stripes, but finally just settled on the tape.  I put it up on my mantel with some of my other patriotic decor.
I think it looks kinda snappy with it's bold stripes!

If you like this patriotic project and want to see a few more, just click on the link above these pictures and check them out!


I know, I know......I have a lot of 4th of July projects and even more to come....but as I said.....
I L-O-V-E the Fourth of July!  I really do!
Thank you so much Margret for letting me guest post here today!  You are one fabulous 


Thanks so much Danni! I love all your festive projects. I'm a slacker when it comes to anything other than my birthday.

Sunday, June 17, 2012

The Easy CD Holder

Since we're redoing our basement, we're changing everything around. There's a trunk in my living room that I wanted to hold movies. There was a catch though... it was already holding CDs.
I needed to find a new place to hold the CDs since I had my heart set on using the trunk.
I found an old box from a robot kit. What? Anyway, I figured it was perfect.

I taped the corners of the bottom and lid to reinforce them.

I found some silver wrapping paper which was the only thing that didn't have Santa or say "Congratulations!"

I cut the corners and then wrapped up the box.

The inside was not beautiful....

The outside actually looked pretty good, though...

This was the trunk I wanted. I'm thinking about filling in the scratches, repainting it, and then distressing it.

There were SO many more CD's than I thought. I had to use both the lid and the bottom to hold them.
I even found we had 10 Simon and Garfunkel CD's. Who even needs that much? Well we got rid of a bunch of kids CDs and empty cases. We stored the boxes under a table that used to be in the basement. The table sits behind the couch and is totally out of sight. Woo. No one has to see it and I get to have my little trunk in the basement! Woo. More to come about it.

Wednesday, May 30, 2012

5 Minute Ribbon Holder

The other day I was cleaning my craft room and realized just how much ribbon I had. I finally had enough to make some sort of a ribbon holder. Gasp. Every crafter's dream. Not really but it's been on my "to do" list for a while. So I finally set to it. 

I found a dowel at the hardware store for around 60 cents. I had my dad cut it into 2 pieces on his big fancy saw. 
Then I drilled two holes using a drill press on a block of wood and sanded the dowels and the block.
 I added a little bit of wood glue to the holes, and stuck the dowels in. A few coats of paint and about 10 minutes for drying time I was done. The longest part was painting it which I didn't necessarily have to do so that's why the title is only "5 minute" instead of 10.


My OCD kicks in when I notice that the two ends aren't even. I think that happened when the dowel was cut in half. Oh well. They do say measure twice, cut once for a reason!

 Here it is in it's new home!


Sunday, April 22, 2012

Newspaper Dress

'
I don't know about you guys but I'm not a big fan of the new blogger. It's so... plain. I'm still out of sorts and haven't posted much in a bit of personal rebellion. Okay that's over.  
My friend and I made this beauty for a contest and we haven't heard back yet. Hopefully we will in a day or two. This dress is going to be shown in an Art Show at our school on tuesday. 


This was a LOT of work and resulted in a few second degree burns from the hot glue gun. I haven't done much creatively lately. I guess you could say I've been busy with my little babies which you can find some adorable pictures of here. I just love them. They're growing up so fast! Or you could blame my pile of schoolwork which is mostly undone.

Saturday, March 24, 2012

Guest Post: Chalkboard Shoes by Sew Can Do

I have a nice treat for everyone today! She can introduce herself: 

Hi Everyone!  I'm Cheryl from Sew Can Do.  I'm a self-taught crafter & designer who loves making unusual things.  I learned to sew just a few years ago and I share my crafting adventures, tutorials and project ideas on my blog:  

 
I also host a weekly link party, Craftastic Monday, where people can link up their latest crafty creations.
I was honored to have Margaret ask me to do a guest post here at Chica es Artistica.  I wish I'd started as early as she has with her creative ideas!  Today I thought I'd share an easy & fun idea I came up with: Chalkboard Shoes.  


I can't tell you how many times I've been tempted to buy sneakers with cute print designs.  The problem is they rarely go with much stuff, so they really don't get worn as much as they could.  Add in that there's usually a higher price, so most of us can't afford to have more than one pair.  So I took matters into my own hands and came up with these.  They're cheap, give you loads of looks and are fun to decorate!


How To Make Them:
- 1 pair of canvas shoes (Got mine at Target for $9.99)
- 1 jar of chalkboard paint (There are several kinds: sprays, the craft kind, the "regular" cans, etc.).  I used the craft one.   
- Foam paint brush
- A roll of painter's tape (if you're like me & not the neatest painter)
- Package of chalk

I taped over the laces to keep them neat and then brushed on a coat of the paint all over the shoes.  Since I was doing white on white the edges near the bottom were pretty easy, but if using another color paint, I'd recommend using tape down there too.  After an hour I added the second coat and then let dry overnight.  The next day I conditioned them by rubbing chalk all over them:


And then wipe off with a a dry sponge or chalkboard eraser.  I had the not-so-hot idea of using a damp paper towel and blue chalk, so let's just say that could have gone better (read - that combo made some edges I missed a bit blue).  Definitely best to stick to the dry stuff.  Also using stick chalk gives way better control when drawing than those shaped ones or the giant sidewalk style ones.  Now you & the kids can decorate to your heart's desire.  Write messages, draw designs, get the kid's to make some wearable artwork, the possibilities are endless.


This would make a fun (and inexpensive) gift for kids.  Just add in a box of chalk & eraser and it's ready for a budding artist to beautify.  Thanks for having me over at Chica es Artistica, Margaret! 

Monday, March 12, 2012

St. Patricks Day Decorations

This year I got lazy and pulled out last year's St. Patty's day decorations. Here they are:


You can find the directions (along with some crappy photos!) here:

Pennent

Pot of Gold

So loving my "new" camera and all the great pictures I can take now!

Monday, January 2, 2012

Camera Strap Cover Tutorial

It's sort of a right of passage. As soon as you get a big, fancy camera, you have to have a cover for the big fancy strap. You can't let it run naked, can you?


I picked up a half yard of fabric and a half yard of fusible interfacing from an extremely over priced store. Even though the fabric was half off and I got the cheapest interfacing I could find, I still walked out of the store 5 dollars poorer.

And look at how great their measuring is. I asked for a half yard of each.
 Okay. Sorry about my rantings. On to the tutorial!
You may need to change around measurements, but I used two pieces that were 2.75 in. by 27 in. I wanted mine to have two sides but you could just do one piece that 5.5 in. by 27 in. The finished strap will be about 23 in. long.
 Sew the two pieces together with the right sides facing each other.
 Iron down the seam flat
 If you want a more stiffer strap, I'd advise using fusible interfacing. I cut a piece that was 5.5 in by 27 in. Due to my little mishap with the fabric store, my piece wasn't long enough so I had to use a long piece and then a short chunk.
 Follow the directions on the interfacing.
 Mine called for another piece of material on top of the interfacing.
 When you've got yours all ironed, you'll probably end up with some edges sticking off like so:
 Just simply trim them off.
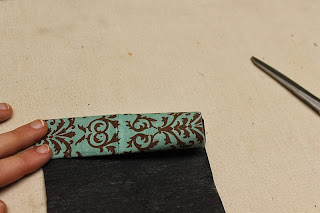
 Next, fold the short edges over 1 inch
 And then over again another inch.
 Sew it down.

You can do only one seam. I decided to do two.
 Fold it over, right sides together and sew.
 Trim off the extra seam allowance so it's easier to get on.
 Turn it inside out

 Iron it
  And slide it on! Which is probably the hardest part. And... Wallah! A beautiful camera strap cover.

Related Posts Plugin for WordPress, Blogger...