Much to my dismay, I do not own photoshop. And truth be told, the generic photo editing software most computers come with just doesn't cut it.
Here are a few of my favorite online photo editing sites:
Foto Flexer- Kind of like an online version of photoshop but simple
Pixlr- A very simple editing program that is easy to use but limited
Gickr- A site for creating gif files (moving pictures)
Those are definitely my top 3 go- to sites when iphoto fails me.
Have a great day everyone! My to-do list is just too long to stay and chat!
I have some amazing DIY projects coming up... hopefully soon!
They're all ready to be started... we just haven't gotten that far.
Showing posts with label Photography. Show all posts
Showing posts with label Photography. Show all posts
Sunday, July 15, 2012

Friday, July 13, 2012
Pet Photography Tips
We all strive for perfect pictures. It's true. Children really are easier to photograph than animals. Children know human commands and if they don't listen to them they usually at least understand them.
Animals are different. Dogs can understand simple commands like sit, stay, and lay down... but most animals aren't dogs.
The number one tip is giving up control. The animals or pets aren't going to do what you want them to do. They're going to play, run, and do what they please so just accept it right now and things will be a lot more stress free.
Let your pet do what they please and just shoot away. You may end up with pictures like this one where the subject is blurred. Here I actually caught her leaping out of the carriage.

Or you may get pictures like this.

Just remain calm and your pet will too! They can sense if you're stressed or aggravated. If you're calm and welcoming, they'll come to you on their own.
 I was kind of scared to actually be sitting on the ground inches away from these ravenous beasts with my little baby (my camera) in hand but when I calmed down, they came to me and I got some great pictures like the one above of my chicken, Isla.
Another thing is clever props. Give your pet something to play with or let them hop into something.
 I threw my puppy, Rory, into this antique baby carriage and she was all smiles and I was able to capture this great photo which we're going to get developed and frame.
 I gave her (she stole) an old birthday hat and let her go to town tearing it up. I find this picture hilarious since it captures that look, her sideways way of sitting, and a majority of her toys laying around the room behind her.
Capture the moment! Don't worry about lighting or posing or anything. If your pet is doing something cute, capture it! My older dog, Max, loves to lay in the laundry baskets. She doesn't mind if they're clean or dirty. Anyway, I caught her doing this in the laundry room and snapped a picture of it. Its dark and she looks scared but it's something I can look at and remember.
Not all pictures have to be perfect!

Now go get some pictures you'll cherish forever!
Animals are different. Dogs can understand simple commands like sit, stay, and lay down... but most animals aren't dogs.
The number one tip is giving up control. The animals or pets aren't going to do what you want them to do. They're going to play, run, and do what they please so just accept it right now and things will be a lot more stress free.
Let your pet do what they please and just shoot away. You may end up with pictures like this one where the subject is blurred. Here I actually caught her leaping out of the carriage.

Or you may get pictures like this.

Just remain calm and your pet will too! They can sense if you're stressed or aggravated. If you're calm and welcoming, they'll come to you on their own.

Another thing is clever props. Give your pet something to play with or let them hop into something.


Capture the moment! Don't worry about lighting or posing or anything. If your pet is doing something cute, capture it! My older dog, Max, loves to lay in the laundry baskets. She doesn't mind if they're clean or dirty. Anyway, I caught her doing this in the laundry room and snapped a picture of it. Its dark and she looks scared but it's something I can look at and remember.
Not all pictures have to be perfect!

Now go get some pictures you'll cherish forever!
Tuesday, July 3, 2012
A Quick Hello
My life is currently incredibly busy. I spent 9 days in Nashville, Tennessee complete with two 9 hour roadtrips. One with my mom and sister; the other with a family friend and an incredibly well behaved 5 year old and dog. Now I'm home, safe and sound.
Our journey started out at 4:30 am. By around 8 the coffee was cold and our bellies were rumbling. Turns out finding a Starbucks in Ohio is like finding a needle in a haystack.


When we got there we got to see some sweet little cousins.

I got to take some pictures of baby Kelley. She turned 9 months old! Her mom had gotten some of those great little sticker things off of Etsy that show her age. Please enjoy the only non- iphone pictures in this whole post.


It was a consistent 105 degrees there. I'm SO happy to be back in the 90's.
I feel like everything has grown and I've been gone for so long! My little puppy, Rory, (You can find pictures of her cuteness here) has officially learned to sit and she's growing bigger!
Things have been just so busy! Good thing I fly out tomorrow for New Orleans! It'll be a bit more calm around my blog since I don't have a whole lot planned for this upcoming week.
Enjoy the Fourth of July, folks!
Our journey started out at 4:30 am. By around 8 the coffee was cold and our bellies were rumbling. Turns out finding a Starbucks in Ohio is like finding a needle in a haystack.

It was a beautiful drive, though! We passed the Kentucky River.
Yes, my friends, this is an iphone picture. What?

There were also some odd sightings like this one.

Reaching Tennessee was a very great moment, indeed. I urge everyone to not use Trip Tic from AAA. It said our drive to Nashville was only 8 hours. Nope. It's a solid 9 or 10. Where there was supposed to be an exit 208, there was not one. Thank God for iphones.
My mom also continued on to Florida with my sister. It's not a six hour drive as Trip Tic told them. It was a nine hour drive.

Nashville is seriously a beautiful city!

When we got there we got to see some sweet little cousins.

I got to take some pictures of baby Kelley. She turned 9 months old! Her mom had gotten some of those great little sticker things off of Etsy that show her age. Please enjoy the only non- iphone pictures in this whole post.


It was a consistent 105 degrees there. I'm SO happy to be back in the 90's.
I feel like everything has grown and I've been gone for so long! My little puppy, Rory, (You can find pictures of her cuteness here) has officially learned to sit and she's growing bigger!
Things have been just so busy! Good thing I fly out tomorrow for New Orleans! It'll be a bit more calm around my blog since I don't have a whole lot planned for this upcoming week.
Enjoy the Fourth of July, folks!
Monday, January 2, 2012
Camera Strap Cover Tutorial

It's sort of a right of passage. As soon as you get a big, fancy camera, you have to have a cover for the big fancy strap. You can't let it run naked, can you?

I picked up a half yard of fabric and a half yard of fusible interfacing from an extremely over priced store. Even though the fabric was half off and I got the cheapest interfacing I could find, I still walked out of the store 5 dollars poorer.

And look at how great their measuring is. I asked for a half yard of each.

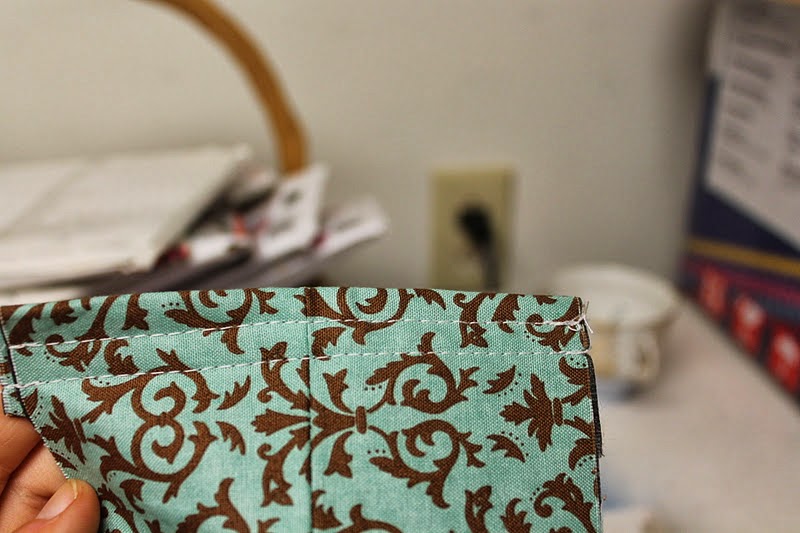
You may need to change around measurements, but I used two pieces that were 2.75 in. by 27 in. I wanted mine to have two sides but you could just do one piece that 5.5 in. by 27 in. The finished strap will be about 23 in. long.


You can do only one seam. I decided to do two.


Sunday, June 5, 2011
Make Your Own Bokeh Filter
You've probably either seen or heard about these before. I definitely have seen quite a few posts about them going around blogland. I just had to give it a shot. I just searched "Bokeh Filter Tutorials" and found about a million of them. Here's a few of them:
DIY Photography
A Bit of Sunshine
Pompo
KristyKreme
My first and only tip about doing this is DON'T GIVE UP. It's tough to master this. I couldn't even get my pictures to come out 100% like I wanted them. Here's my take on this method:


 Here's my very own homemade bokeh filter. Don't worry I fixed the holes before I used it.
 I had a BUNCH of mess ups and fails but some shots did come out really neat.


 I tried a candle but with little success, I moved onto Christmas lights. I had to zoom in very far to actually see the heart shape of the lights. My camera is basically just a fancy point and shoot. It looks like a DSLR camera. HA. I wish. See:

DIY Photography
A Bit of Sunshine
Pompo
KristyKreme
My first and only tip about doing this is DON'T GIVE UP. It's tough to master this. I couldn't even get my pictures to come out 100% like I wanted them. Here's my take on this method:


Did I mention I broke it? A nice scratch to the lens. Wonderful. Oh and the battery holder lid thing doesn't stay on but duct tape does the job. For the $120 I got this for, it was worth it. Do I want a nice big camera. Well, yes! Doesn't everyone?
Subscribe to:
Posts (Atom)
